Sunday, February 12, 2012

Egg Rolls

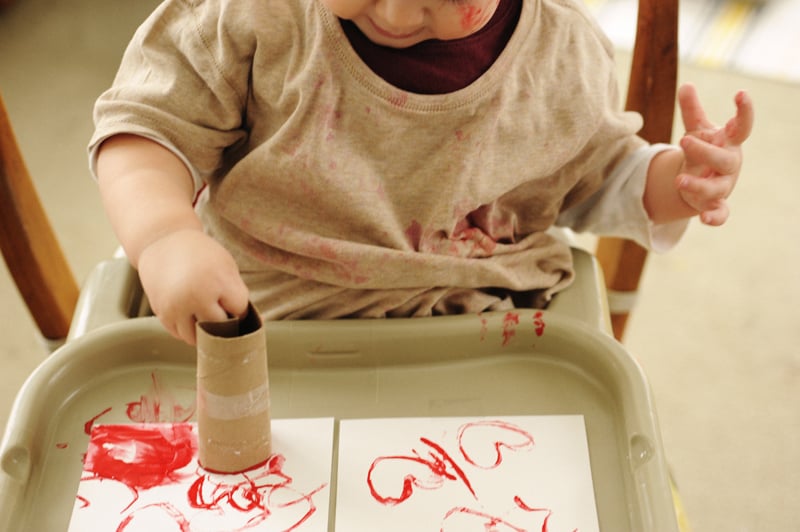
We experimented making veggie egg rolls tonight. It was a huge success!He really loved holding the entire roll and easily biting off some veggies full of flavor. He ate a ton of vegetables without even know it! Recipe below.

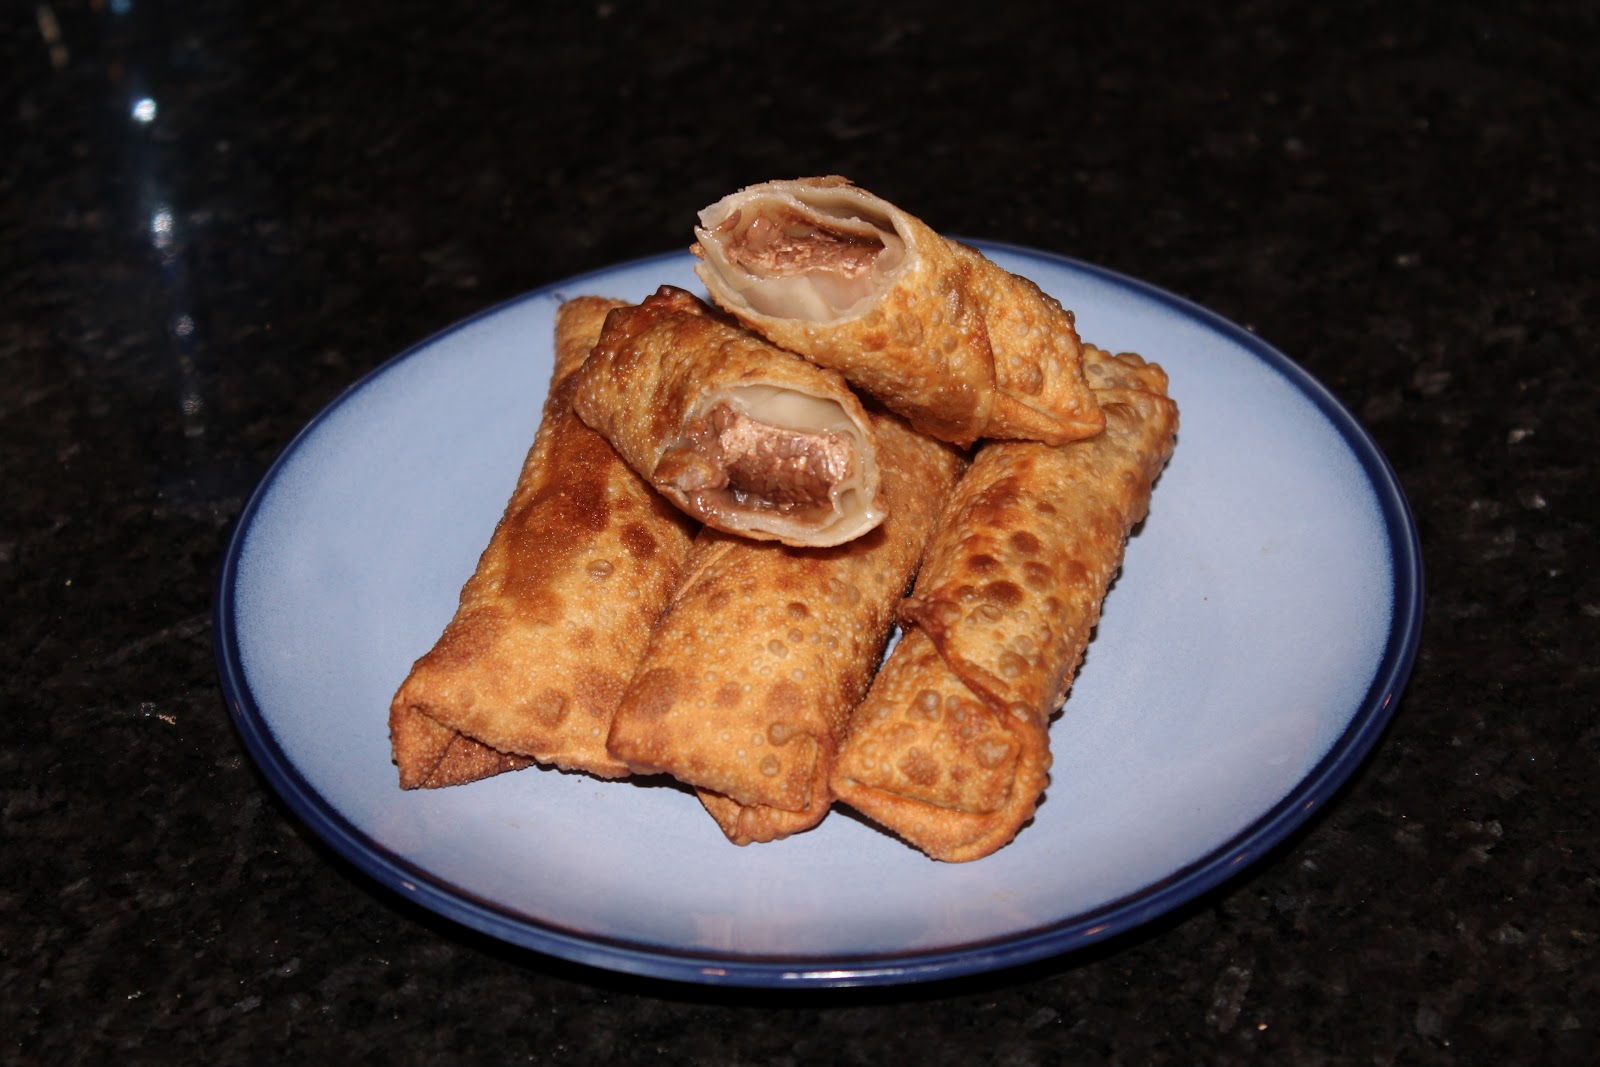
Dessert Egg Rolls. Left over egg roll wrappers filled with Milky Ways, or bananas and peanut butter, or Resee's peanut butter cups with a banana slice. YUM!!! So easy and a fun dessert!


Egg Rolls - invented on the "Fly" tonight and very successful!


10 Wonton Wrappers
1 cup Broccoli Coleslaw mix
1/2 Red Bell Pepper - minced
1/2 Medium Red Onion - minced
3 Tablespoons of low sodium Soy Sauce
1 Tablespoon of grated Ginger
1 Tablespoon of minced Garlic
Vegetable Oil

Dipping Sauce (also a made up addition on the fly) 
1/4 cup Soy Sauce
1/4 cup Rice Vinegar 
1 teaspoon Sesame Seed Oil
1 Tablespoon Honey
sprinkle of red pepper flakes
Use a large deep skillet to heat oil to 350 degrees. (Iron skillets work great) ***TRICK*** Your oil is hot when you put the handle of a wooden spoon in the oil and the oil begins to bubble around the base.  - Careful not to be too hot.
Saute or use a wok to cook vegetables until soft. Add Soy sauce, ginger, and garlic and cook for another 1-2 minutes. Remove from pan, place in tightly woven colander and drain. A soggy mix will make a soggy egg roll.

Place one spoonful of the mixture in the bottom corner and begin to roll to the opposite corner, stop half way and tuck in the sides. Dip your finger in water and lightly dab water other unrolled corner (this will help them stick together).  Then finish rolling. Set on wax paper until ready to fry.

Fry for one 45 seconds to one minute and flip. All ingredients are already cooked and warm so you are just cooking they wonton. Watch these carefully as they can burn quickly! Place cooked rolls on plate with paper towel to drain and cool slightly before serving. 


Tuesday, January 31, 2012

Update Your Book Collection

A short article found on www.thebump.com


Puppets are a fantastic way to interact with your little one. you can sing, dance, share animal sounds, and practice a huge piece of creativity - pretend and imagination.

Many baby stores and book stores have a variety of puppets for all personalities.

Monday, January 30, 2012

Valentine's Day Crafts


This is a gift for an adult to make with a young child. It’s a poem with a handprint and an optional photo of the baby/preschooler.


Not all small flying creatures are pests. You and your kids will surely welcome these little paper love bugs into your home!


Make this fun and colorful valentine wall print hanging with your children’s hands! A little paint, construction paper and crepe paper streamers, and you have a festive wall hanging for the holiday of love.


Salt dough is a really fun medium and you can make so many things from it! Try these adorable salt dough heart magnets and pins to give as gifts.
Be sure to check out our other ideas for Valentine's Day, including more Valentine's crafts.

What you'll need:

  • ½ cup salt
  • 1 cup flour
  • ½ cup water
  • Wooden spoon
  • Rolling pin
  • Extra flour
  • Heart-shaped cookie cutters
  • Magnets
  • Pin backs
  • Hot glue
  • Acrylic paint (pink, white, red, light blue, yellow, white, pink, silver)
  • Pink and orange glitter glue
  • Gold glitter paint
  • Toothpick
  • Paint brush
  • Acrylic sealer
  • Wax paper
  • Cookie sheet

How to make it:

  1. Preheat the oven to 250 degrees F.
  2. Mix together, salt, flour, and water until dough is formed.
  3. Knead the dough on a floured surface until the mixture is elastic and smooth. If dough is too sticky, sprinkle with flour and continue to do so until stickiness is gone. Do not add too much flour as this will dry out the dough and cause it to crack before it's baked.
  4. Roll out the dough to about ¼" thick with a rolling pin that has been dusted with flour.
  5. Use different sized heart-shaped cookie cutters to create as many pieces as you like.
  6. For smaller children, use a single shape to make it easier at painting time. For older children, you can double up and even triple some of the hearts for a 3D affect as we did (see photo).
  7. Place all hearts onto an ungreased cookie sheet and place into the preheated oven.
  8. Bake for 2 hours.
  9. Remove from oven and allow to cool completely.
  10. Paint with acrylic paints, glitter glue and/or glitter paint and spray finished projects with acrylic sealer.
  11. To write the words on the conversation heart pins, use a toothpick dipped in white paint.
  12. Hot glue a round magnet to the back of larger hearts to hang on the fridge, and a pin back to the conversation hearts.

Tips:

  • To make 3D polka dots, simply roll salt dough into small ball shapes and place on top of heart before placing into oven.
  • Parents should not allow small children to handle a glue gun as burns can occur. Older children should be closely supervised if allowed to handle it themselves.
  • Salt dough will not keep for later projects as it gets hard and cracks. Depending on how many hearts you plan to make, you can either halve the recipe or double it.
  • You can also incorporate the heart shapes to make animal pins with cute sayings. Example – use a white heart as wings on a pair of bees and write “Be Mine” on them. 


This thumbprint heart bookmark is an easy craft perfect for school age children. Parents will adore this, since the hearts are made using the child’s thumbprint. What an excellent and easy gift to give for Valentine’s Day!

Supplies

Red and white cardstock or construction paper
Red stamp pad (or red paint)
Hole Punch
Length of ribbon (red, white, pink)
Scissors
Designer edge scissors
Glue

Click here for printables, patterns and Templates

Instructions

1. Cut out two rectangles from the red and white cardstock, each 1.5 inches wide and 6 inches long.

2. Using your thumb, press it into the red stamp pad or paint. Then, depress your thumb down on the white cardstock rectangle, at a slight angle to form one half of the heart. Then, overlap the first thumbprint with a second thumbprint to form the heart. See the photos below for proper placement. Using paint can be a bit trickier. Practice on scrap paper first.

3. Make four hearts down the center of the white rectangle.

4. Cut off the long edges of the white rectangle with decorator edge scissors.

5. Glue the white rectangle to the center of the red bookmark, to frame it. Allow to dry.

6. Use a hole punch to punch a hole near the top. Thread through some ribbon and tie. Here I used velvet ribbon. I applied glue to the inside of the ribbon and attached the other side to it, and allowed it to dry with a clothespin holding it in place until dry.

SuppliesSkin Colored Construction Paper
Red and Pink Construction Paper
Pencil
Scissors
Glue
Markers

Click here for printables, patterns and Templates

InstructionsFold a piece of skin colored construction paper in half. Place your hand on the folded paper with edge of your palm (near the pinky) lining up with the fold. Trace around your hand except for edge on the fold. Remove your hand and cut out. Open up. Cut hearts out of construction paper. Paste on palm. Write message "A Handful of Love" on the card and sign.
Courtesy of www.freekidscrafts.com/


Bubble wrap is such a fun material for kids to craft with. This Valentine mobile is beautiful and lots of fun to make.
Supplies
White Red and Pink Construction Paper
Paint, White Red and Pink
Bubble wrap
Cord
Hole Punch
Scissors
Ribbon

Put small quantities of each paint on paper plate in bands.

You can cut the bubble wrap in valentine shapes just a little larger than you need or you can cut a square larger than the ultimate valentine and press it into the paint.

Press the painted bubble wrap onto the construction paper. The different color papers will make the paint look different. Let dry.

Cut out the finished Valentines in varying sizes. Use the picture as reference.

Punch a small hole in the top and bottom of each heart except for the smallest heart.

Thread the cord through the hearts to form the mobile creating a loop at the top for hanging. We decided to tape to our door for a decoration.

Create bows to decorate the hearts and glue on.

Hang up to brighten your day.

courtesy of www.freekidscrafts.com 


Let kids of any age craft their own Valentine's Day greetings for classmates and friends with heart-shaped stamps made from potatoes.


 Let kids of any age craft their own Valentine's Day greetings for classmates and friends with heart-shaped stamps made from potatoes.

What you'll need:


  • 3 to 4 large baking potatoes
  • Heart-shaped cookies cutters
  • Cutting board
  • Sharp knife (for adult use only)
  • Butter knife
  • Paper towels
  • Foam brush
  • Water-based paint in desired colors
  • Blank greeting cards or folded cardstock paper in white and pink or desired colors
  • Assorted charms, appliqués, stick-ons, ribbon, glitter paint and accouterments
  • White craft glue
  • Small twist ties or wire


What to do:

1. To make heart-shaped stamp: On a cutting board, an adult should take a thin lengthwise slice off one potato. Opt for the flattest side and cut enough to give you a large surface area of potato flesh.

2. Let the child choose a heart-shaped cookie cutter, then center it to fit on the potato and push down into flesh as if cutting dough to make cookies.
3. Using a butter knife, kids can slice potato around cookie cutter about 1/4 to 1/2 inch down so that knife hits cookie cutter and stops it from cutting below shape.
4. Pull off excess and remove cookie cutter. Hint: You may want to notch top and bottom of potato to delineate top and bottom of heart shape.
5. Pat potato dry with paper towels. Use foam brush to apply a very thin layer of paint to heart-shaped stamp.
6. Position stamp over cards in desired place and press down, trying not to let potato slip. Hint: Practice a few times on a blank piece of paper, so that the child gets the hang and feel of the stamp.
7. Repeat in desired colors, and with different sized cookie cutters.
8. When paint is dry, about 30 minutes, play with different add-ons. Glue, stick, paint or attach your embellishments onto cards surface in desired place.

Courtesy of www.parentdish.com

Sunday, January 29, 2012

Homemade Playdough

Homemade Playdough
10 different Recipes! 


Music Parade


Use a wooden spoon and a tin pie pan. Yes, it makes a ton of noise, however, normally doesn't last too long and is a complete joy!

I am sure that every household with kids has plenty of milk jugs ready to be used for activities. Put a few pennies in a cleaned jug. The more pennies, the louder the sound. We found 6 six a good number :)

Mess Free Finger Painting

Buy your favorite toxic free finger paint. Add a few dollops to a easy close, clear, plastic bag. - Best Part: It's reusable! You can also open it slightly, let it dry out, and it can be hung in the windows for decor.

Let him use different utensils to try and move paint around the bag.


***This is an idea that I used when I taught kindergarten. I used to fill zip lock sandwich bags with paint and allow the kids to practice making letters and sight words! ***

Shaving Cream Painting

Mix cheap shaving cream with some food coloring. Let the kiddos go crazy in the tub!

Let the kids have the container, what's the worst that could happen, they may get shaving cream on them in the bath tub? :)


**Stole this great idea from my sister-in-law, who is super creative! Can't wait to share more of her ideas!***

Playing with the Pets

He loves playing with the cats and dog, however, he gets a little aggressive and over bearing for the pets. New Idea: attached some feathers and ribbon to a long stick and create a nonthreatening toy to interact with the pets.  


Laundry Assistance


All kids like to push things around. I gave him the empty laundry basket to push back to the bedroom to get loaded with clothes. He would push the basket back to the top of the stairs (to the baby safety gate) and I would carry it downstairs to the laundry room and return it to him at the top of the stairs.  He would take it back to the bedroom for another load.

Balloons

Balloons are some of the cheapest fun!!! You can normally find a bag of 25 or 30 for $.99. We carry them around, drum on them, try to bat it back and forth, kicking it down the hall, and of course creating a static connection.


Use a wooden spoon to try and keep the balloon from touching the ground. This helps to build hand-eye coordination.

Making Old New Again

I have gotten many quiet moments from simply getting out his old Prince LionHeart seat. We got it out for a younger friend visiting and he realized he missed it. He would carry a handful of books over to it, sit down, and read quietly for several minutes.
Check google or your local baby store for this seat! It is GREAT! Unlike the Bumbo seat, this bebePOD seat has wider leg holds to hold larger babies as well as active toddlers wanting their own space.

Handy Helper

Have your little friend become your little helper. He loves pushing the swifter around, when it's on. So why not have them help. It may not be productive but he does get a few dust bunnies. 

He was about to get in the tub one night and daddy turned on the big vac. He came RUNNING! So he spent a few minutes vacuuming and then we could continue with the bath routine.


Found this online! It's a chore, NO, it's a game!!! Awesome!


Painting

Finger painting with washable paint makes for a great activity. Make sure you are willing to give early bath time or do it right before bath time. Stripping kids down to their diapers or undies make for much easier clean up also.


My one year old LOVES painting with the bingo dot makers. It's so easy to use and less of a mess!


Pinwheels

Make your own pinwheel and practice blowing on it to make it move.
Click on the pinwheel to see a how to guide to create a homemade pinwheel!

Productive Destruction and Clean Mud

Allow your kids to be destructive and unroll one roll of toilet paper. - Pictures taken www.JenniKenney.com


Once unrolled, have them tear up the toilet paper into smaller pieces. - Pictures taken www.JenniKenney.com


To make the "Clean Mud" -

1 roll of toilet paper
1 bar of dove soap
Warm water - warm enough to melt soup


Have the children tear up the toilet paper into little bits (the smaller the better). Using a cheese grater, grate the bar of soap into a big bowl. Add the torn up toilet paper to the bowl. Add the warm water a little bit at a time while mixing the toilet paper and the soap together. You have added enough water when the mixture begins to feel like a thick cool whip. Do not make the mixture soupy. The more you play with it the fluffier it becomes. The kids have an absolute blast with it!