Sunday, November 3, 2013

Easy & Cheap Stools - Great for Playroom or Classroom

 I teach 5th grade. For those of you who do guided reading, you may already know that those kidney tables are NOT big enough for fifth graders. I needed something else that didn't take up so much room and could accommodate  more than your typical number of guided reading students (5). 

Snagged the idea from a great blog
She even has a video to help! 

At your local hardware store, you should find buckets for about $2 a piece! 

Purchase spray paint that is meant for plastic, less chance of chipping. 
I used to cans for six buckets - 3 coats each. 

Take the handle off. It just gets in the way. I used my to hang student work from the ceiling in my classroom. (I tied fishing line to both sides of the white handle. Then, I ran ribbon around the bottom just above the "hook" part and stapled it together. In the classroom I use clothes pins to attach student work to the ribbon! It's really fun!)

Find a color that works for you! Red was great! Very empowering for my students.
Choose a fabric that works for you.  


I used a 12" square pillow. Bring the corners together underneath and staple them together. As you go around staple the fabric to the bucket on opposite sides. This way you are able to get a more uniform finish. It took me a few time to get it right. The good thing about using a nail gun is you can pull it up when you don't like the placement or tension. 


I am now carrying this idea into my play room. I will find smaller buckets and smaller pillows to cover. This will be great to add some fun color to our home! 

Monday, September 2, 2013

Reading Picnics

A great way to get out to the house and still have some quiet time:
Book Picnics!

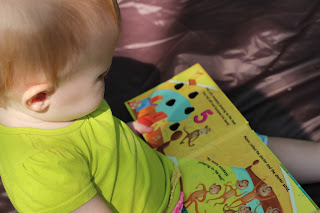
My two love the read and this is when they have some great individual think time. Little man begins reading to himself and our little lady normally sings to her favorite books or starts to point out characters! Both are wonderful comprehension strategies. Letting kids revisit books helps them think about what they have read, helps to introduce strategies for retelling (a great way to read a book), and point out parts of the picture that tells the story!


If you know anything about The Two Sisters, CAFE or DAILY 5 (most educators do, for those who don't it's a great way to help children learn to use reading strategies independently and begin thinking about literature), they encourage children to read books three different ways: read the words, read the pictures, and retell the story.


We began inside, however both children were having a hard time sharing books this day. So I gave each a book blanket that they could use to spread out and have their own space to read.


 That didn't last long and both were reading on the same blanket, but sharing the books.


We have a ton of different books. I try to rotate them throughout the house, stacks will end up in her room then move to his, down to the play room, and in the book box in our car - keeps them entertained while on our way. This way we have many times to revisit them, during the day or for bedtime.


We love all sorts of books! Try the BabyBug magazine (made by Cricket) for little ones. It is built with durable pages that are hard to distroy and cute poems, songs, and stories to do with your little ones. We also love sharing various languages with our kids, try grabbing a few books from other cultures. Babies love to look and read about other babies - there is quite a bit of research behind that thought, not just me chatting. Add some books to your collection that have babies as the main characters. My two are drawn to those! Don't forget some of our favorite authors and titles. Expose your kids to your childhood favorites and soon they will love them also!

 As children revisit text, they are able to tell us more, connect illustrations to text, and pick out important details that make the story. 


I took a step back and let them have their space. WOW, they really know how to enjoy a book. I need to learn to let them and not always get involved or "in the way". Both kids were telling me or pointing at things me in their books that was memorable or exciting. 


Remember, after kids are exposed to books repeatedly only will they have the stamina to read and THINK about they are reading independently. Talk about the books with your kids so that they build their vocabulary and have the words to retell stories to you. 


Sunday, August 11, 2013

Play Ball!

A trip to the park today lead to a wonderful new game for us! 
Play Ball!!! 
Beside one of our parks is a sports complex with 6 ball fields, room for youth football, and tons of space for picnics and such. We needed to, literally, run some energy off so we started pretend baseball. 


It was great to practice naming shapes using the bags and home plate.

We got creative with the rectangle for the pitchers mound and squares for 1st, 2nd, and 3rd - our fields pick them up after each game.

It was a blast to stand at home, let little man pitch to me and run the bases. He took turns "batting" and running the bases!


Realizing that each ball field was numbered we quickly went on a number hunt. It is an awesome way for Little Man to practice spotting numbers rather than letters and to have fun counting. We had a blast giving the kids the vocabulary to have fun on the fields. Fun conversations came afterward about running, bases, baseball, home-runs, etc. !


Tuesday, August 6, 2013

Banana Ice Cream

My son and I have seen the 'helado' commercial on Disney Channel. It's super cute as little man likes to practice speaking Spanish. I told he we would make our banana ice cream just like on TV. 


I froze two bananas, one going brown and the other bright yellow. I thought it would be a good mix of sweet and a bit more texture to hold up to the very soft brown banana.
 

I have a few different tools I could have used. I do have a blender, small food processor (what I choose to use), a large food processor, and a bullet. All would have been just fine to use. I just wanted to use something small and easy to clean. (Dishwasher :) )

I let the kids push the button after we got the pieces in the blender. Much easier if you have them cut into 2 or 3 inch pieces.
After about three minutes, you will start to see it get smooth but there will be larger pieces. It will take close to five minutes to make it a very smooth texture.

Have fun with the toppings. Add nuts, peanut butter, smashed graham crackers, raisins, or anything that your kids would love - chocolate chips, the ideas just keep coming!


I personally added some of the chocolate peanut butter fluff. If you haven't tried it, IT IS A MUST!!! 


This was delicious and it was just like ice cream!!! It was so much fun and how much healthier could one get?!?!?!


Monday, August 5, 2013

Growing Tomatoes - Finding the Mysterious Worm

Just about everyone is growing tomatoes as well as other things these days! Turn it into conversation pieces. 

You and your children can have a blast looking for the flowers and talk about how the bees and other insects pollenate the flowers so they will produce fruit. Also, this is how all fruit start out. 

We have one plant making tons of little fruit! We go on a hunt to find all the growing fruit and look at the different colors. It's really exciting to watch the kids realize the food is growing and changing. Patience is hard for young ones, and adults sometimes, too! 

Watch as they turn from green to yellow to orange to red! 

It's fun to find the hidden fruit on the plants. 

We also talk about the size and look for ones that are smaller, bigger, smallest, largest. It is really neat to help them find ones of the same size (matching). 

Another opportunity for giving your child vocabulary is providing them with the words stalk, base, leaves, shoots, etc. 

Now, we have a mysterious worm. (I got one last week and now there seems to be another one!! yuck!) I'm still on the hunt for this one!  
 We discuss the different ways we can tell we have a worm. Some of the fruit has been eaten, holes in the leaves where is has been eaten away and......

worm poop (fun to give them the word scat also for poop). Be honest with yourself....it's fun to talk about poop! 

Each day we water our plants together. 

Once a week we fertilize our plants and talk about how it is helpful to the plants and harmful to us. 


Hummingbird Feeders

After being in the beautiful Rocky Mountains of Colorado with my family, I realized that I was missing a HUGE opportunity for my kids to be a bit closer to nature here in the Chicago burbs. Why not let them help me fill the hummingbird feeders!!!!!

Awesome opportunity to give them an understanding of how birds find food, give them new vocabulary words with meanings, and let them practice colors, mixing, watching sugar dissolve, and of course helping our local bird population!


There were so many little birds dive bombing us, it was amazing. If you were patient enough you could get one to perch on your finger. My husband's amazing aunt has my daughter showing her the hummingbirds up close!!! So Cool!!!!


I use a 4:1 ration. 1 cup of water to 1/4 cup of sugar.
We heated the water in the microwave for about a minute - not boiling - just hot enough to dissolve the sugar.


I let one kiddo add a few drops of red food coloring and the other got to stir. They loved watching the drops take over the entire container.


I showed my two kids the funnel. Now that's a fun word to get a 2 1/2 year old and 15 month old to say. We giggled more that got it out but it was fun! I let the little one hold the funnel and asked my son to pour the red sugar water into the feeder.  We talked about how red and other bright colors attract birds and bugs as well as what birds eat. It was a great conversation!


We have the most amazing bay window that the kids can sit inside. This is the best place to watch our little feathered friends. Now its not the best place to attract them so I need to get a few placed around our garden. We do have amazing flowers planted by the previous owners to attract hummingbirds, so we have a good start!!!

I made a second batch to keep in the fridge as a refill - this is what I could take photos of as my hands were helping prevent spills the first go around :)

Homemade Crayons - Reuse Old Crayons

Need a way to use the nubs on crayons or maybe your little one decided to break every crayon your household owns? Here's a great way to make 'new' crayons and have a blast!!!!

We started by sorting crayon into similar colors and a few with mixed to make some funky crayons.

We then placed the muffin tin in the sun. Normally on an 85 degree day they would melt in an afternoon. However, it was only 72 here this day and it was taking a bit long. Our crayons were soft  and started to melt but we wanted to be able to use them that afternoon.

We decided to pop them in the oven, which is what I remember trying as a child. - oh growing up with a crafty mom was AWESOME!! 


Try to get your oven as low as you can go. I was able to set mine to 100 degrees.


 We left them in for about 20 minutes, until they were liquid and glossy on top.


Make sure you let them cool completely or you will have finger prints and dents.


To get them out, we had to turn the pan upside down and bang on it a bit. It also helped to try and lightly twist the muffin tray like an ice cube tray.

Use this as a conversation starter to talk about the sun. You can discuss how the sun heats the Earth, warms the water in pools, lakes, etc, warms the soil so plants can grow. Have fun talking about color sorting, matching light blues and dark blues or opposites on the color wheel (blue vs orange). Anytime you can help build your child's vocabulary, you are only helping them be more successful!!!! Give them the words and let them practice what those words mean. When they get to do - they learn!!!! 


I am not sure about no stick spray and the wax in the crayons. If you try it, let me know what you think.